As social distancing due to COVID-19 shuts down in-person networks of social support for recovering addicts and alcoholics, many 12-step meetings have moved online [CNN, HuffPost, HealthLine]. My colleague, Dr. Amy Krentzman, at the School of Social Work has pulled together a bunch of resources with virtual meetings across programs. However, the online harassment practice of Zoombombing threatens to disturb these sacred spaces. Many of the measures recommended to mitigate Zoombombing don’t apply to 12-step meetings — the links need to be public for people to find meetings and you don’t usually know all the people who may join (so you can’t necessarily filter them through the waiting room). Also, given that many recovering folks are already struggling with the transition, it’s important to make meetings easy-to-join so people can get the support they need. So, here’s my hands-on guide to making your 12-step Zoom meeting “bomb-proof.”
These instructions mostly apply to the publicly-available online meetings rather than the smaller location-specific ones where you may know all the members and have other channels for passing out a password, etc.These steps should be taken by the person who has scheduled the meeting (and usually serves as the “host” for it). (Click on any image to see a larger version):
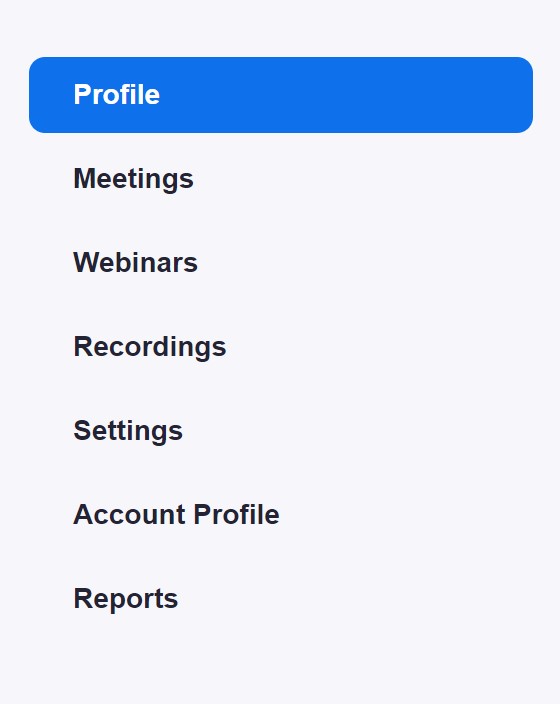
Log into your Zoom account via web browser. On the left side of the screen, there is a list of pages. We’ll start with what you need to do in “Profile” than move on to “Meetings” and then “Settings.”
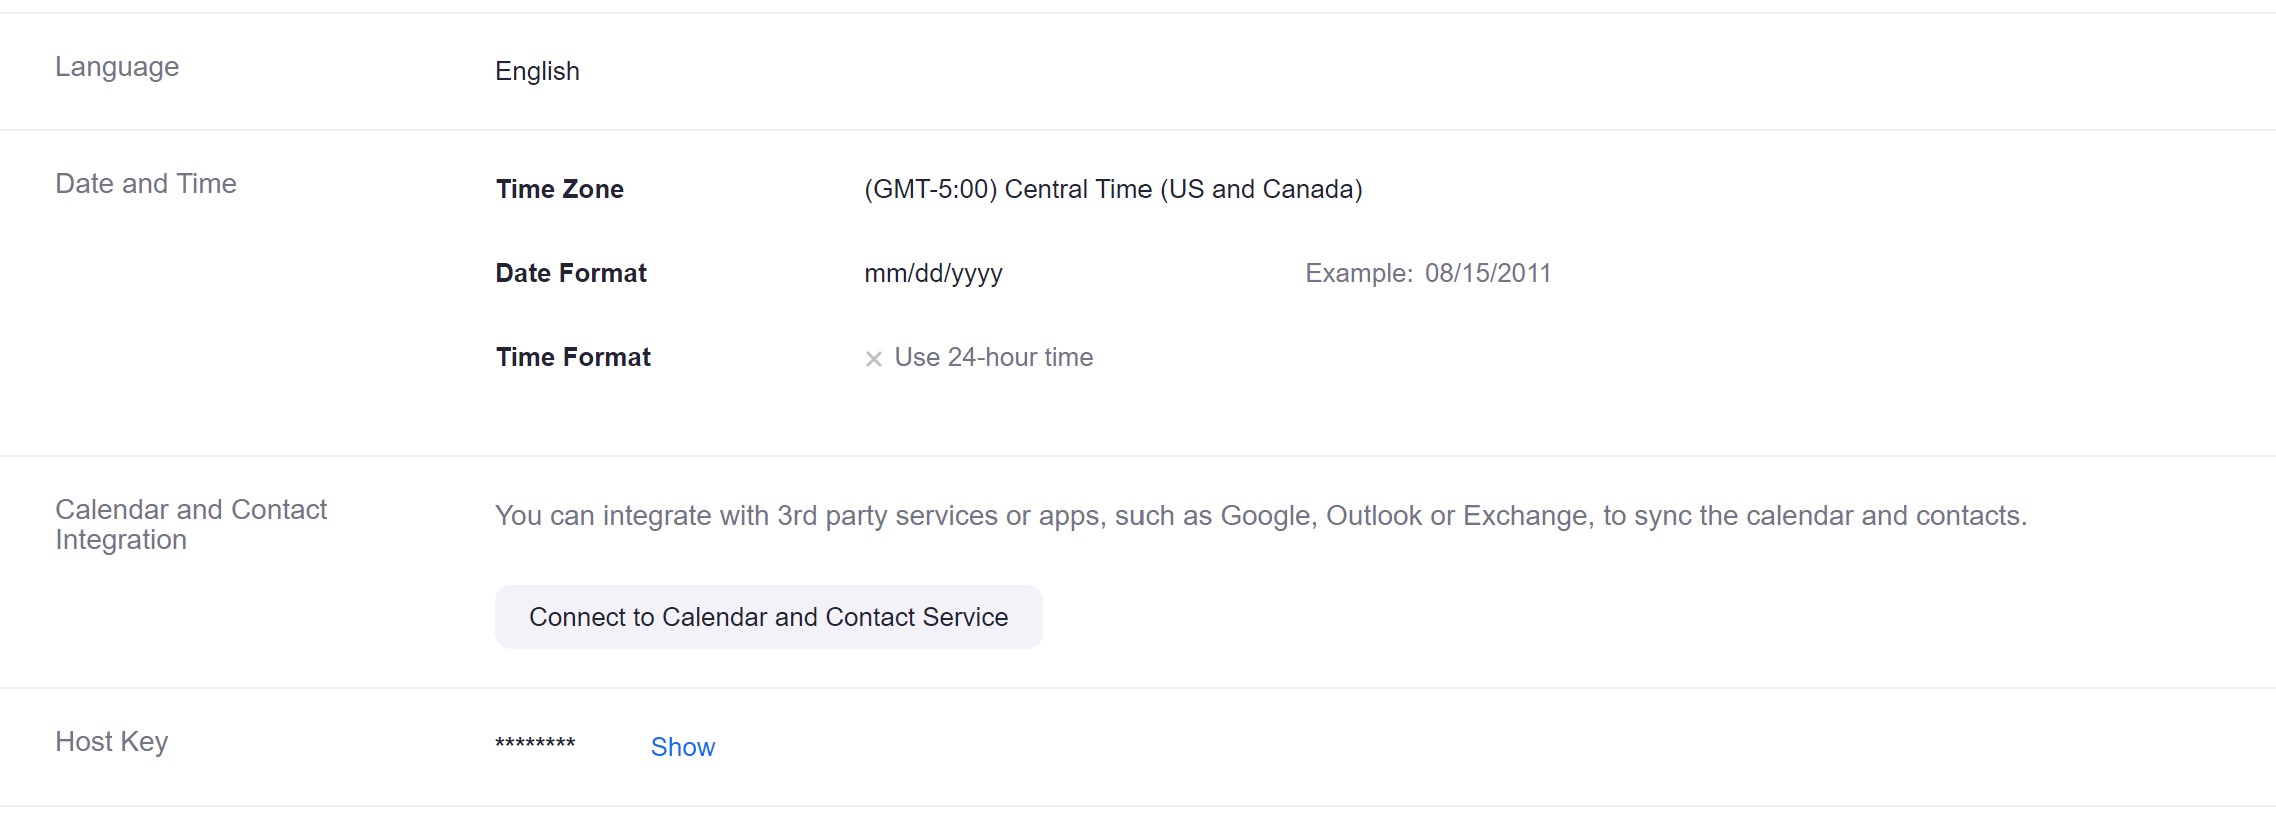
In “Profile,” the only important thing is this “Host Key” at the bottom of the page. You can share this host key with other trusted servants who may sometimes chair the meeting. Then, they can “claim host” when starting the meeting to be able to do things like mute and unmute people.
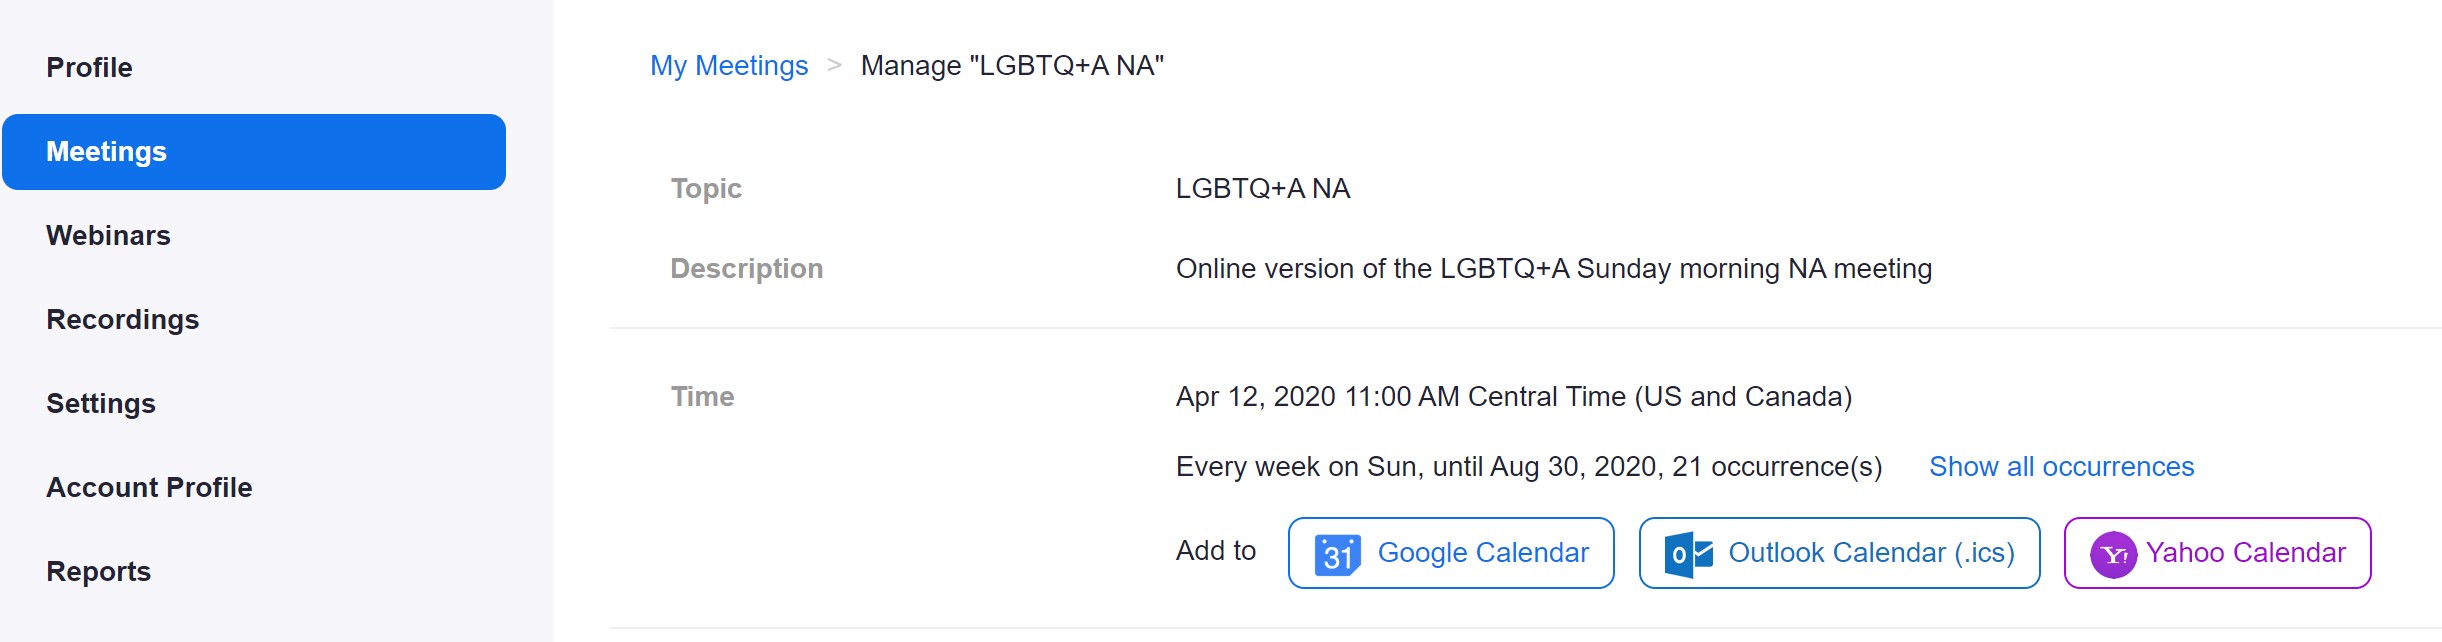
Moving onto the “Meetings” link, you should select the recurring 12-step meeting that you manage. And scroll to the bottom of the page to “Edit” it (select the option to apply the edits for ALL recurring versions of this meeting.
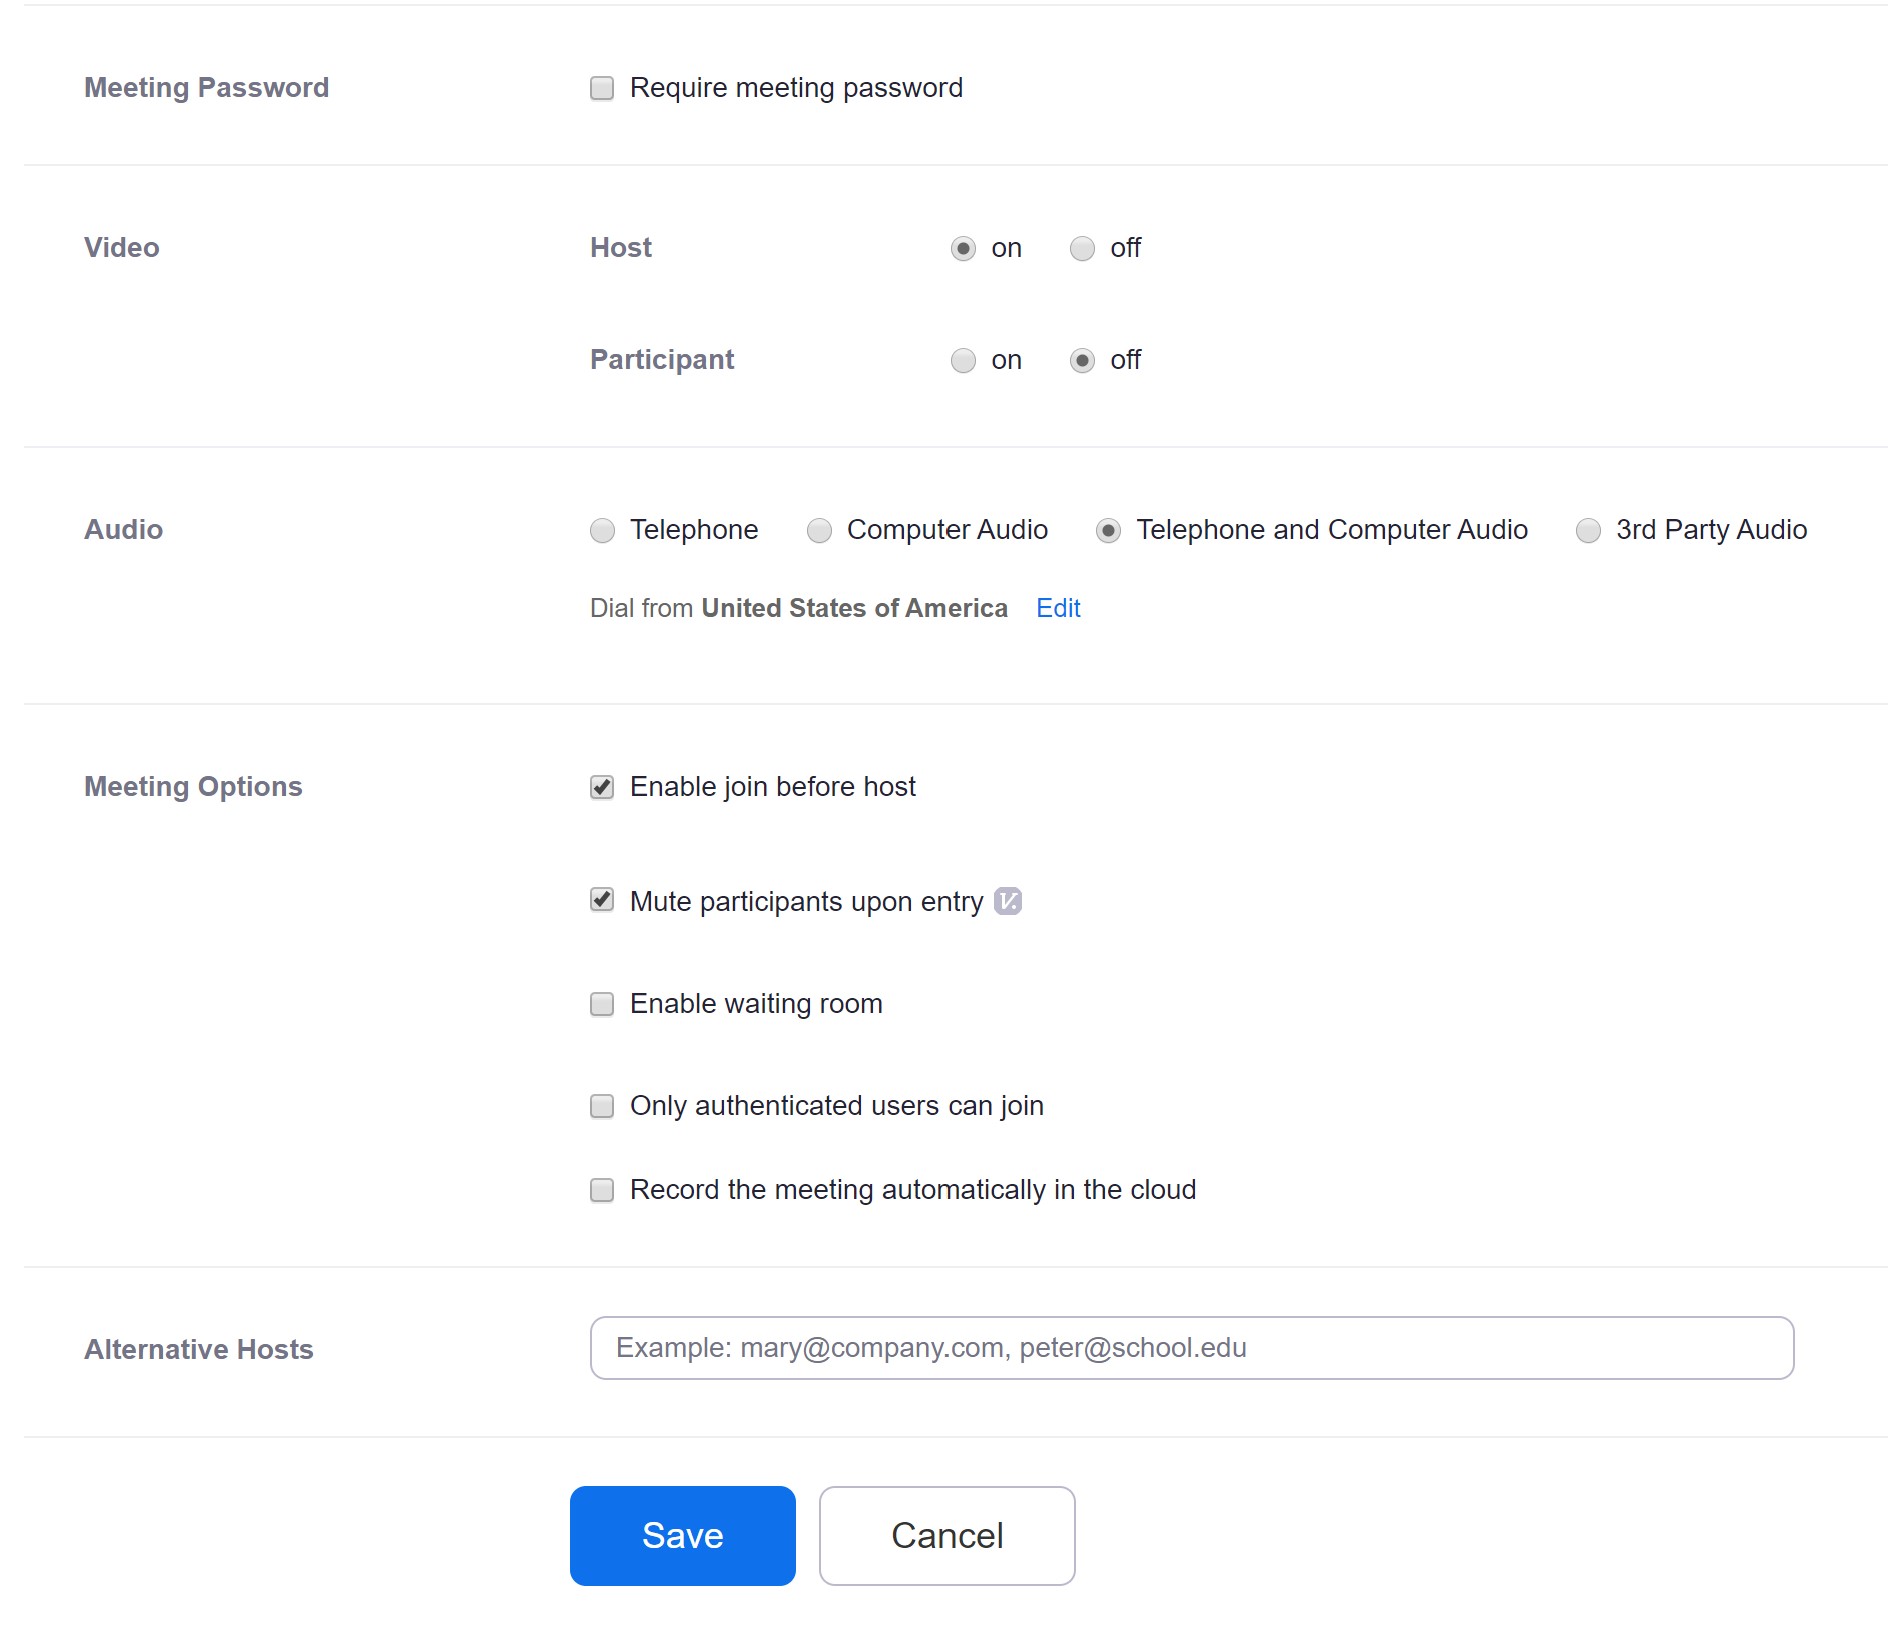
Some options I recommend:
- Don’t require a password if you want newcomers to be able to join.
- Turn off video for joining participants as a default.
- Allow joining by telephone OR computer so people can call in.
- “Enable join before host” is more controversial, but it’s nice for people to be able to mingle in the meeting room early.
- “Mute participants upon entry” is a MUST option since people arrive late.
- I keep the waiting room and authentication options off to allow people to join more easily.
Save these options.
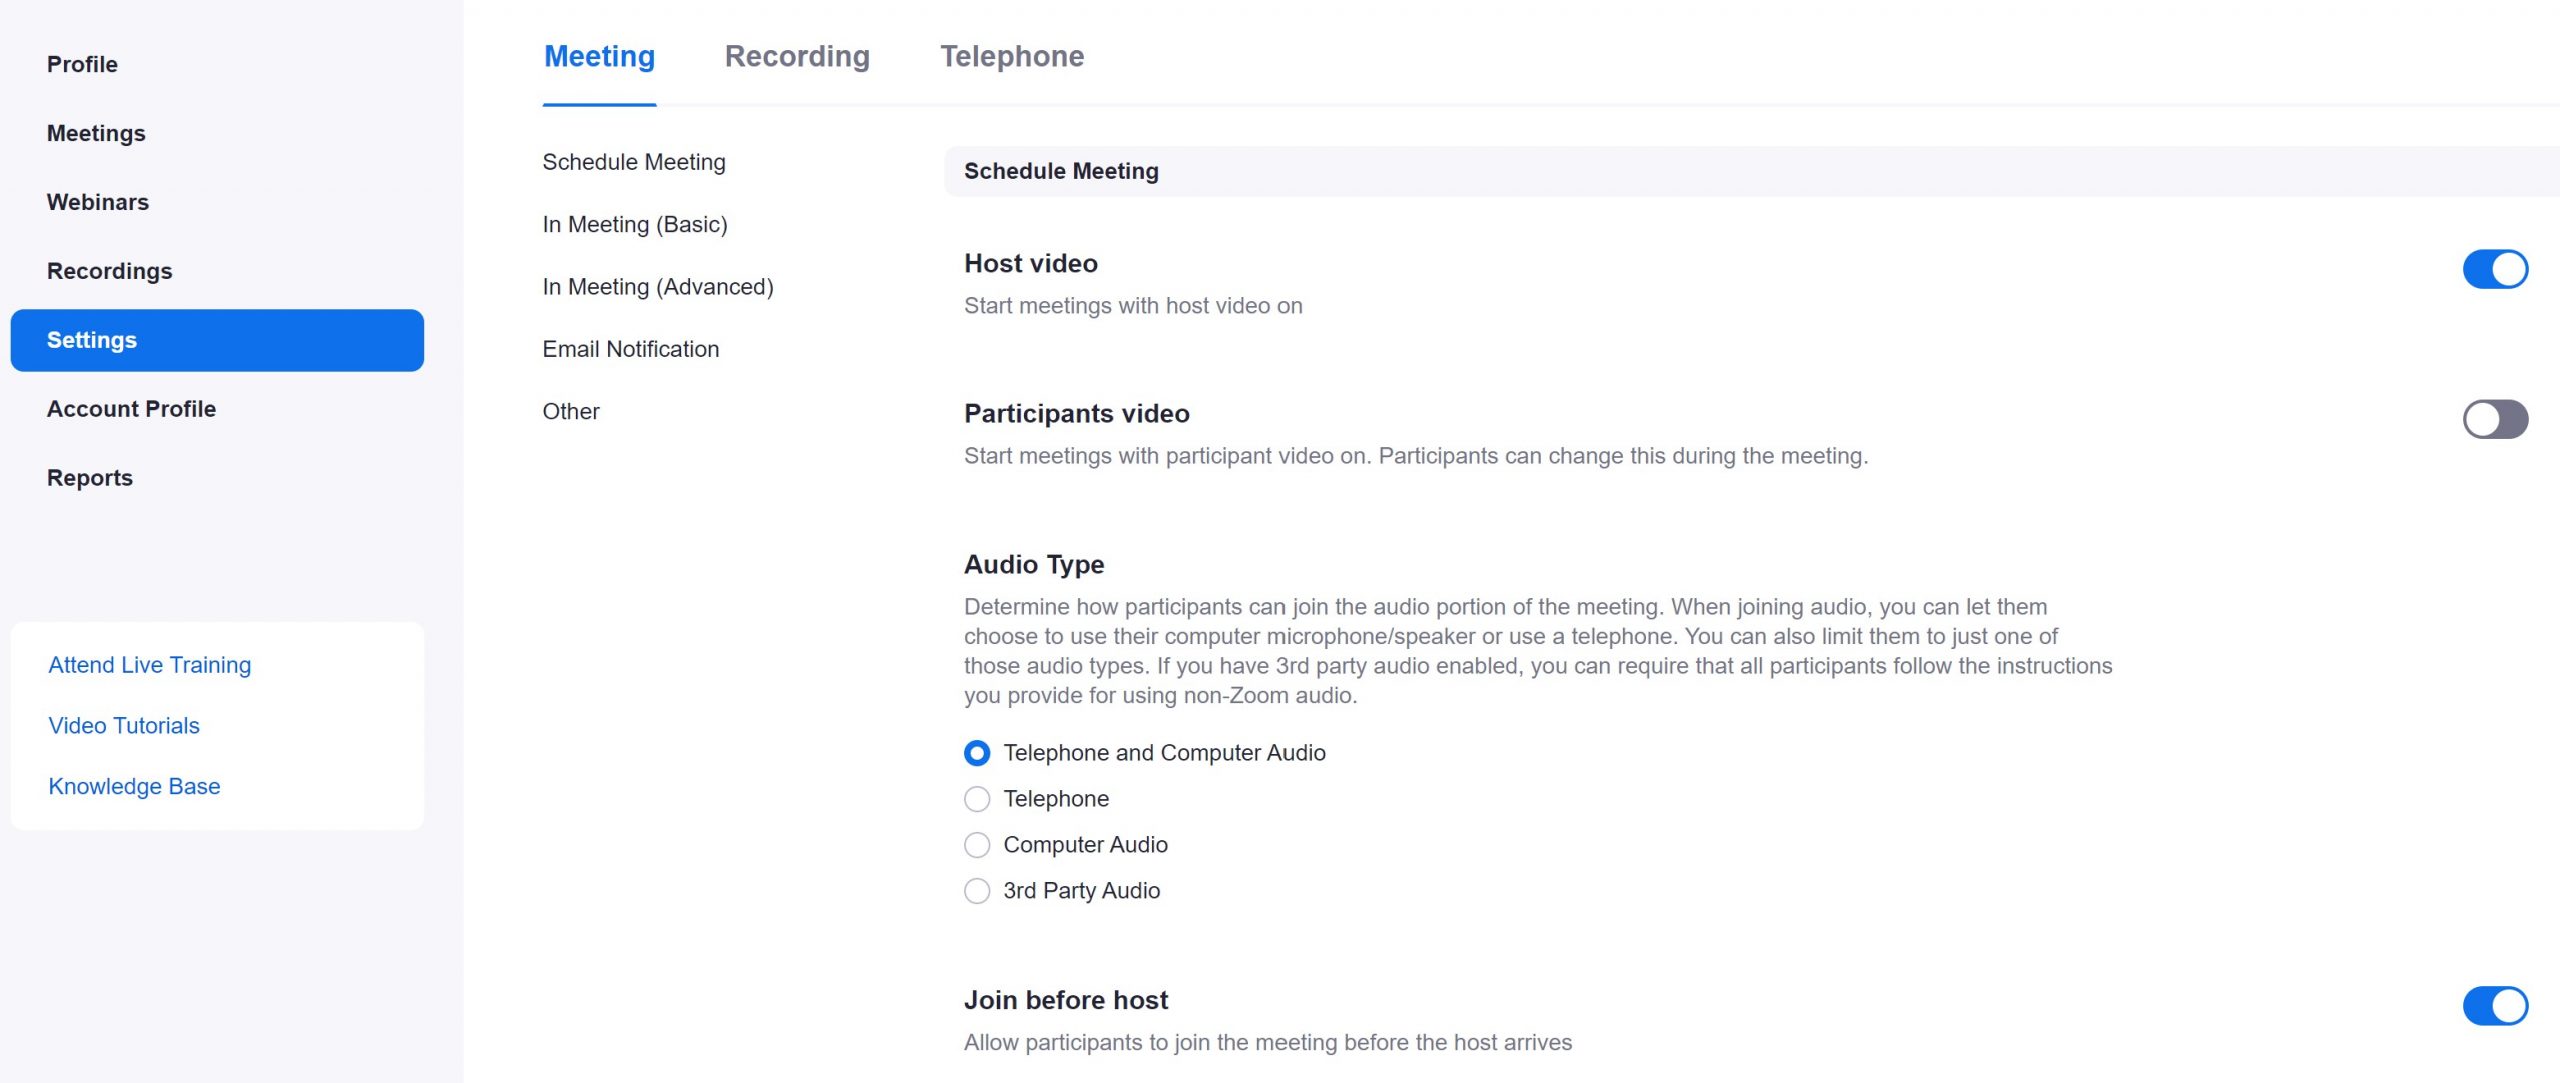
Moving onto the “Settings” link, with the “Meeting” tab selected at the top. We’ve actually set everything on the first part of this page already in the meeting link above, but there are a lot more options if you scroll down…
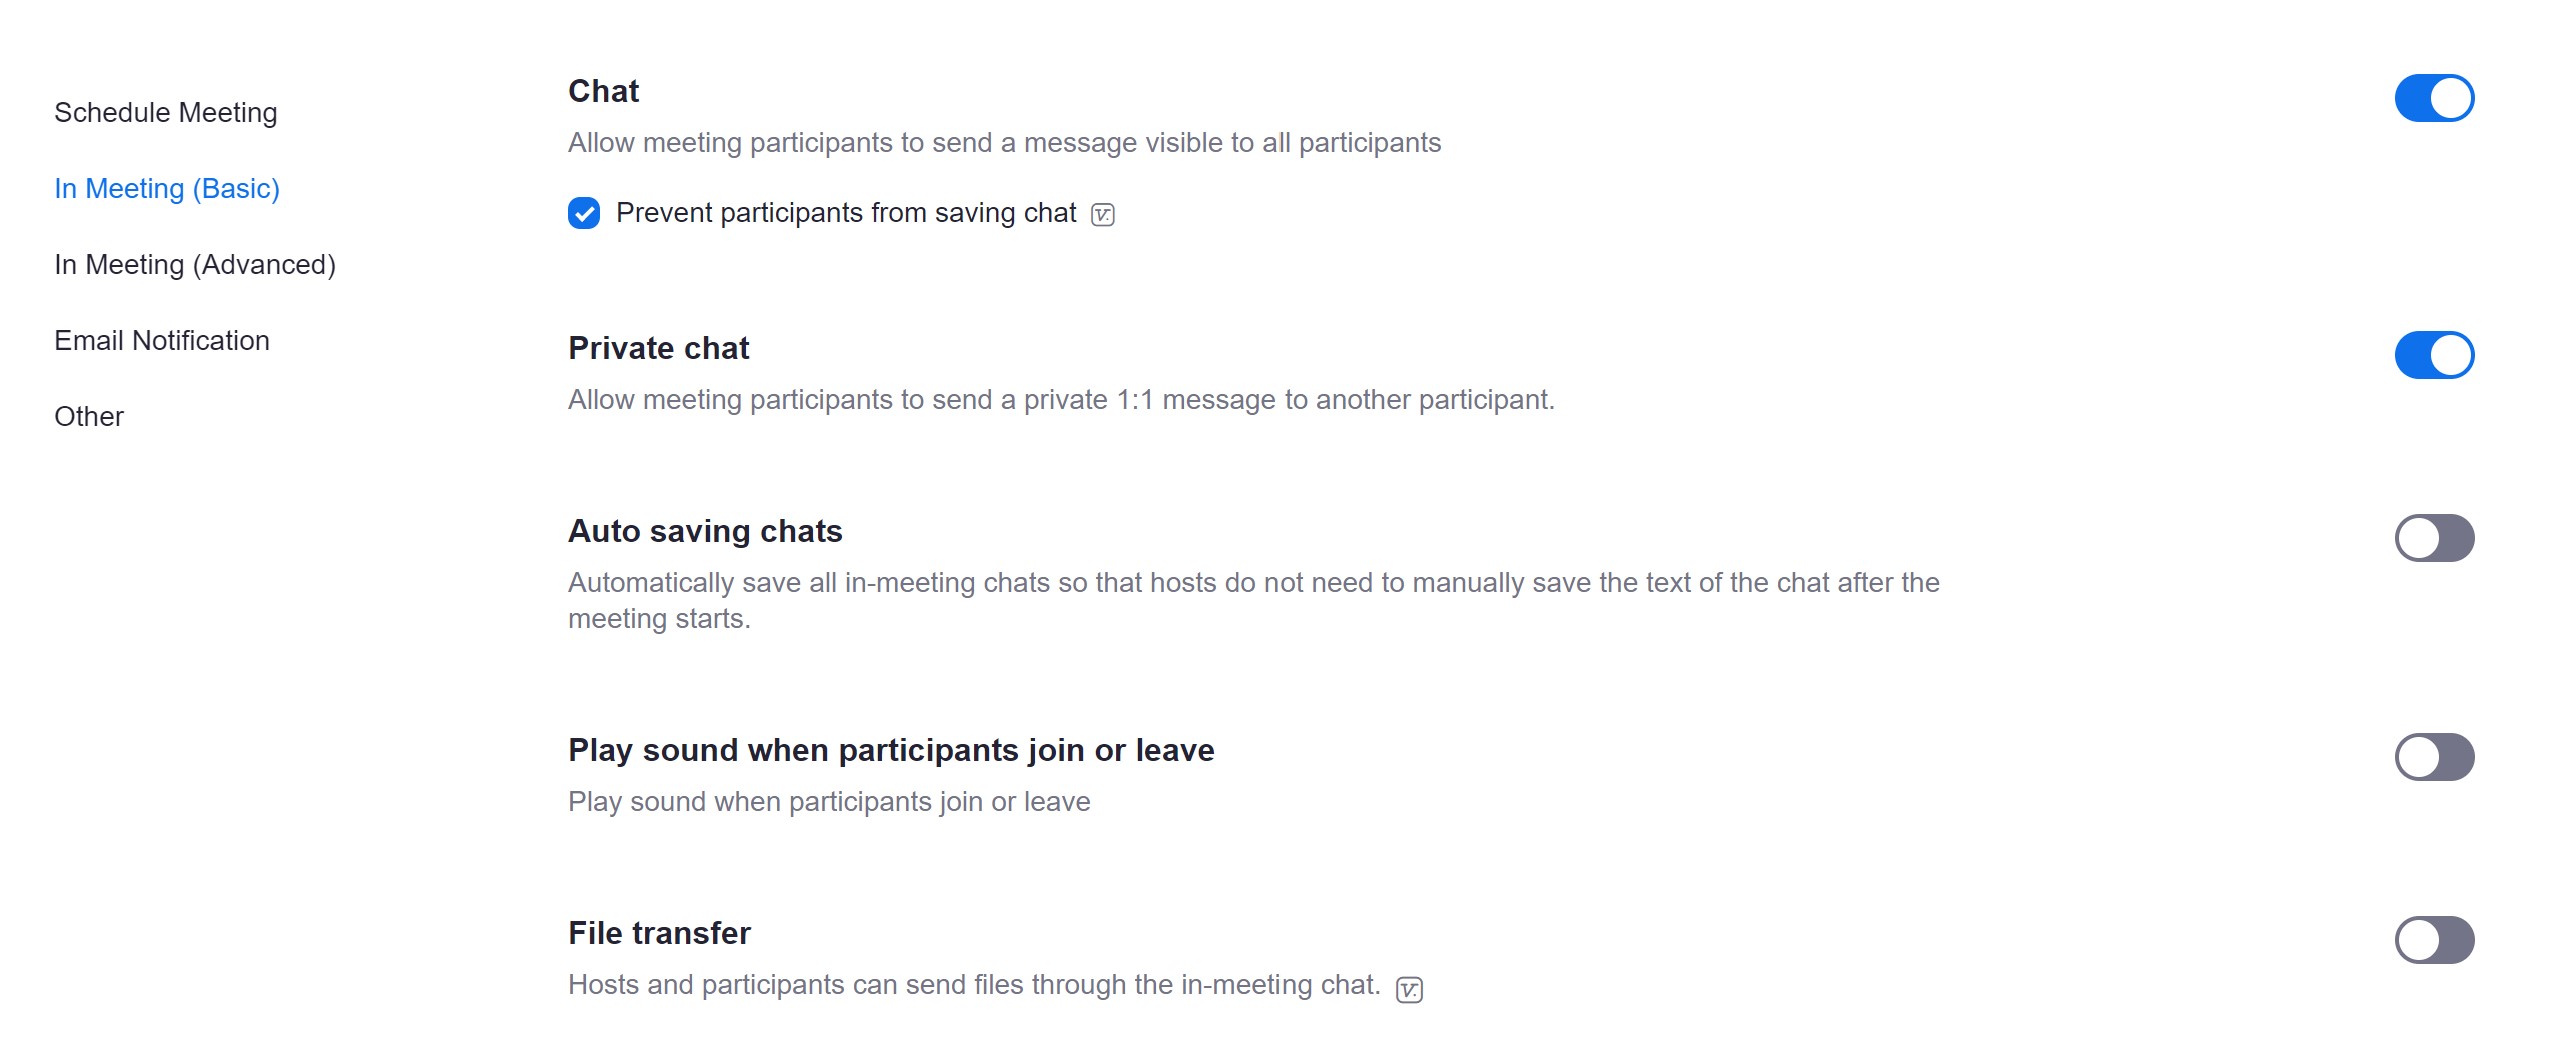
We keep the chat open (though there may be good reasons to also just turn it off), but prevent people from saving it. [Update: We now recommend closing the chat option, as we have seen attacks via this mechanism as well.] The other important option here is to turn off the “File Transfer” (Zoom bombers have been sending things like porn and security attacks using this feature).
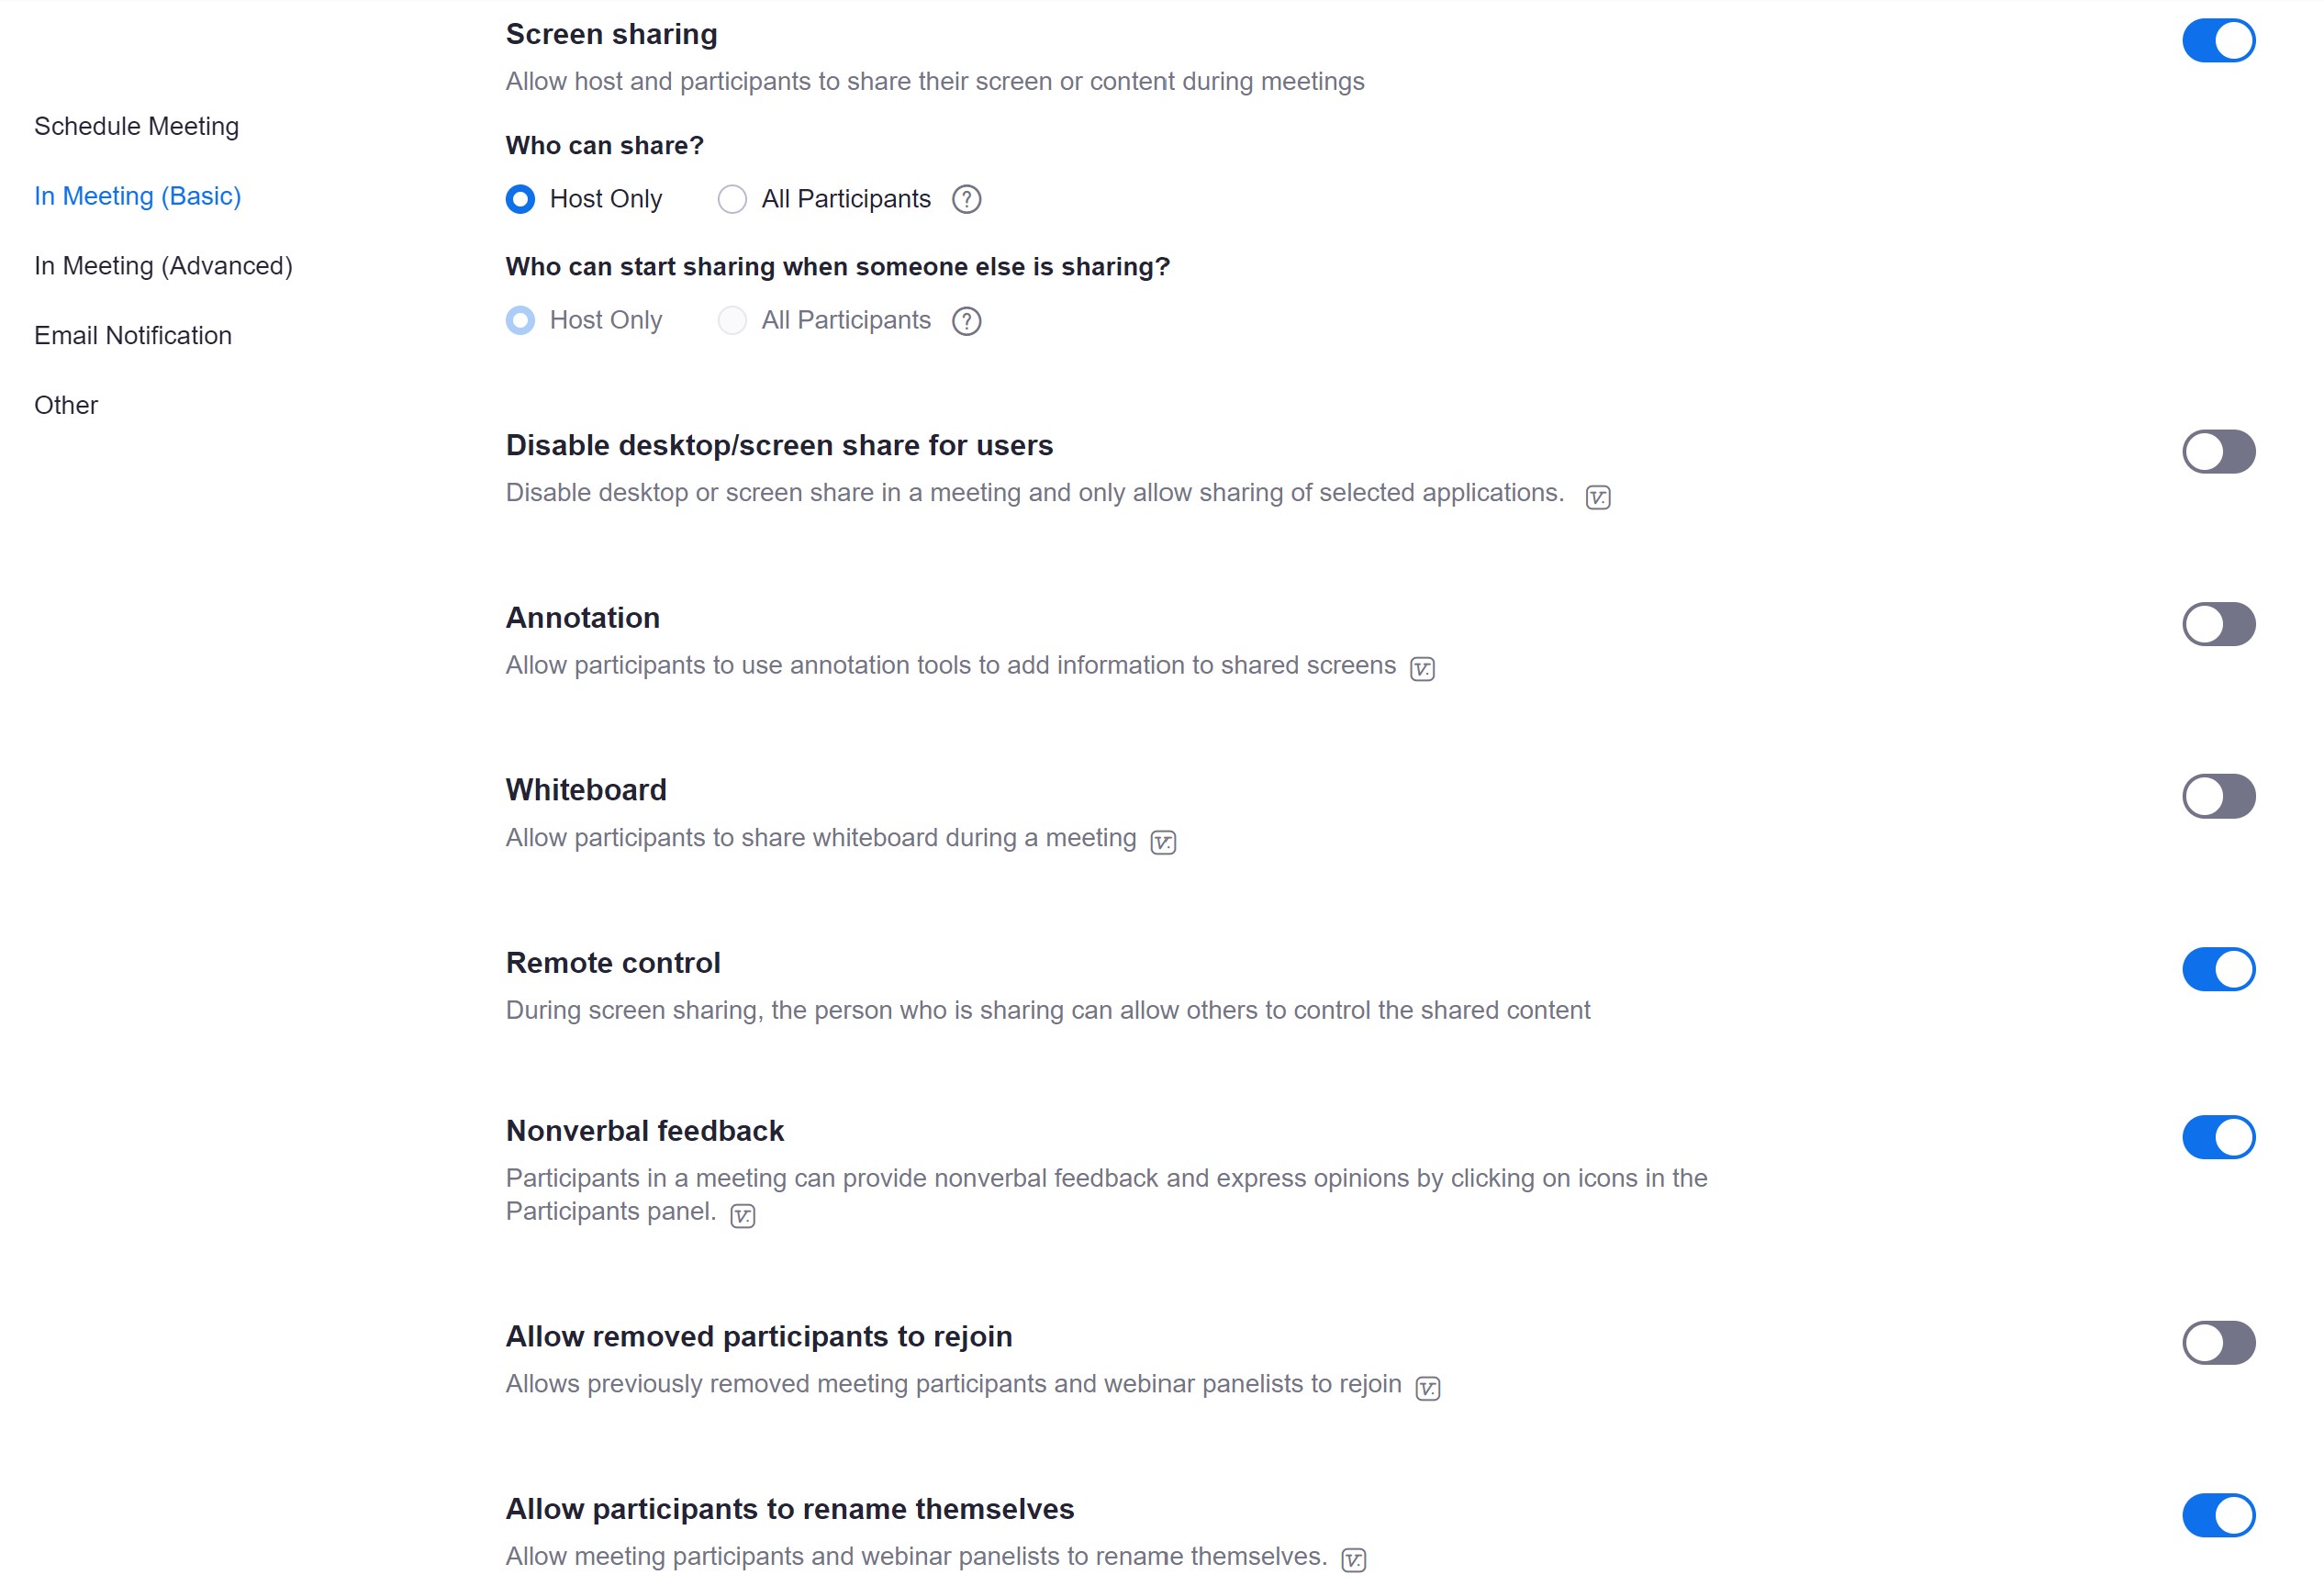
Make sure that your “Screen sharing” is either totally turned off or set to “Host Only” and turn off the whiteboard feature.
Also, make sure that the option to rename yourself IS checked. This gives people the chance to remove their last name to enact anonymity practices.

Finally, scroll back to the top of the “Settings” page and select the “Recording” tab. Turn off the option to allow participants to record the meeting.
All of the above settings will be in-place every time the meeting runs, but there are also some best practices for the host to manage the in-progress meeting once it’s happening:
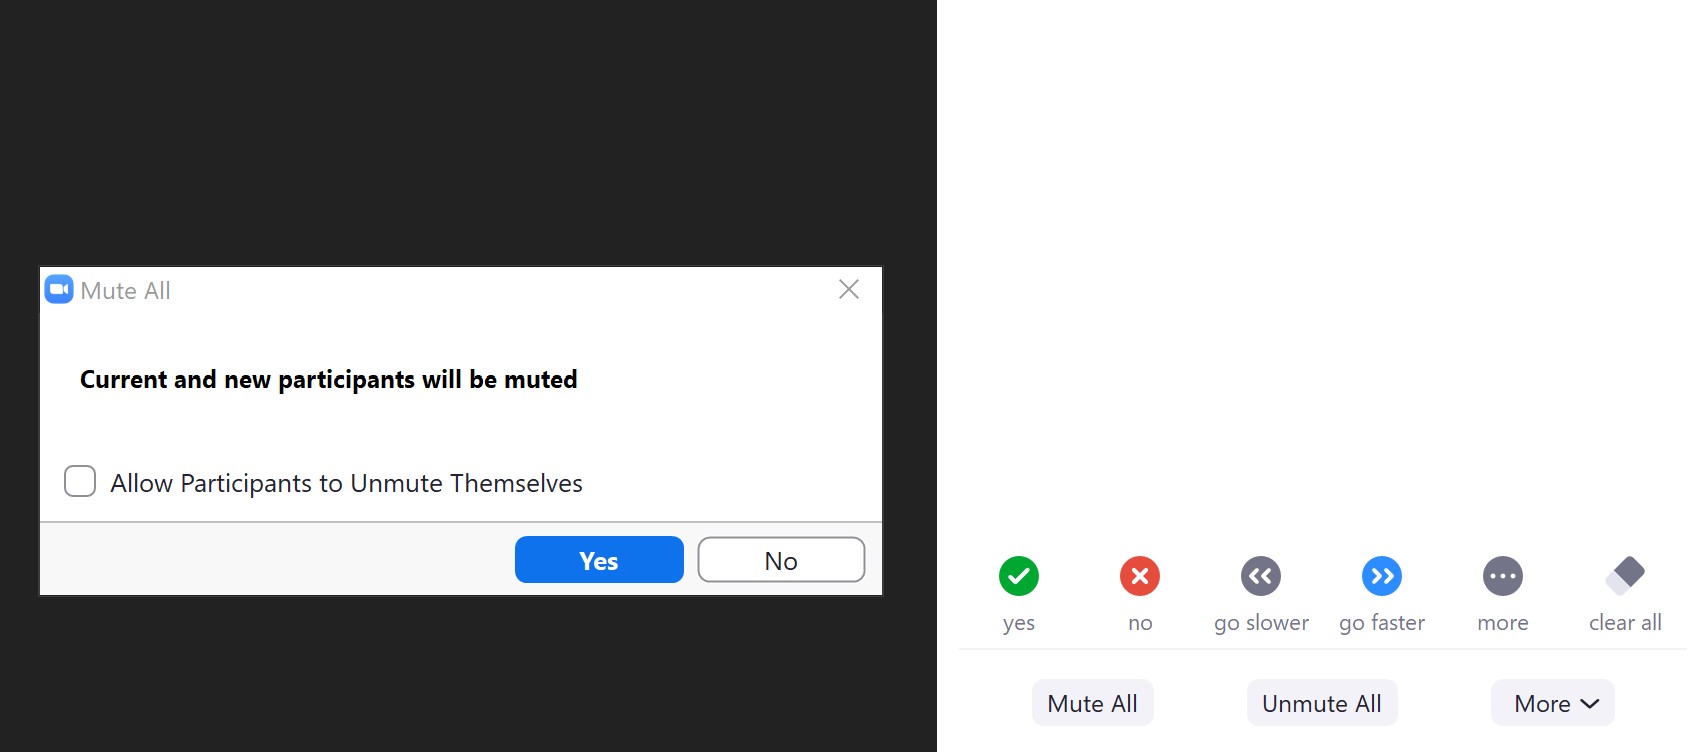
The most important part of the interface for the host is the “Manage Participants” panel that you can open by clicking on the “Participants” button at the bottom of the video.
As the meeting starts, it usually makes sense for the host to use the “Mute All” button to mute everybody and UNSELECT the option to allow participants to unmute themselves.
To read or share, we direct the participants to use Zoom’s “Raise Hand” feature:
- By phone: press *9 to raise your hand
- In mobile app (iOS or Android): Scroll to the bottom left corner and tap on the icon labeled “Raise Hand”
- On a computer (PC or Mac): click on the “Participants” button, at the bottom of your screen (may have to tap on the screen to make it visible); click on the small blue icon in the shape of a hand, labeled “Raise Hand.”
This appears as a blue hand next to the person’s name in the “Participants” tab. The host can now hover over that person’s name and select the “unmute” option allowing that participant to speak. After they are done, mute them again and move on to the next person with their hand raised. This works really well for sharing and it preserves a queue so people who had their hand up earlier can share first…
You can do additional management as a host by turning off people’s video if they’re being inappropriate or even removing a participant out of a meeting, but the steps above prevent 99% of issues that have been causing chaos in meetings!
I’ll just end with saying that I’ve been so incredibly impressed with how fast the recovery community has transitioned online to continue to be there for the people who need it. If you are a meeting host or chair, thank you for your service!