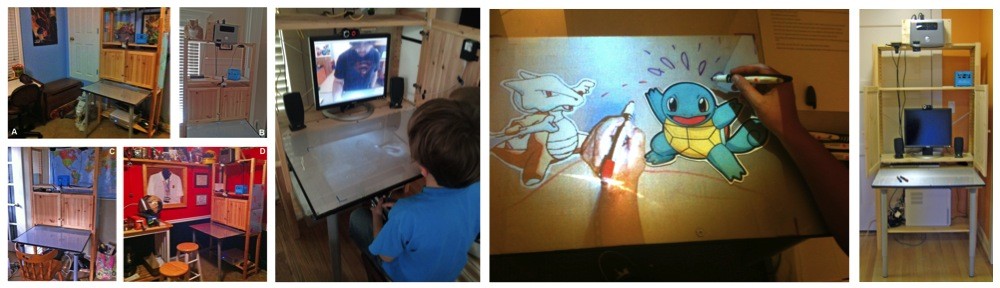
I designed a communication system for families as part of my thesis project (it’s called the ShareTable). During the deployment, I found that it was incredibly valuable to supplement weekly interviews and diaries with automated video recordings of system use. For example, through the diary and interview, I was able to gather that on a particular day the mom and daughter talked to the son using the ShareTable and that the topic of conversation was that he wasn’t feeling well. Interesting as a data point, but not particularly exciting. But, here’s what the same data point looked like when I transcribed the video of this session:
Mom: What’s going on, baby?
Son (age 11): Well, my throat is acting up…
Mom: Awww, well take care of yourself … what else is wrong, sweetheart? … You look like you’re really sad, honey!
Son: I just don’t feel good.
Mom: All right, well listen. I love you … Do you see my hand, holding on to your hand? [Strokes his projected hand]
Son: Yes, I do.
Mom: I love you, baby.
Son: I love you too, mom.
Daughter (age 7): Hey, Bubba. [Also puts her hand on the table]
Mom: There’s my hand. Keep your hand in there, we’re going to do a family handshake, okay? [All three move their hands on the table together]
Much more interesting! And, the video clued me in to the fact that the families were leveraging the camera-projector system provided for the table for creating a sense of metaphorical touch.
Obviously, there are a lot of trust issues in recording video of system use in private settings like the home. It comes down to developing a good protocol with your IRB, developing a trusting relationship with your participant, and answering any of their questions and concerns. In my study, I discussed the issue frankly with the families, stored recorded videos on the machine in their home (not remotely), and let them mark any video session for deletion before the researcher watched it. All in all, it is a bit of a hassle and some participants may never agree to this intrusion, but it was totally worth it for the richness and detail of data I got in the end.
So, if you’re interested in setting up automated video logging for your deployment, here is a simple arrangement that I found worked with minimal need for reinventing the wheel:
- Set up a standard webcam in the home, pointing to the area of interest that you would like to have recorded when your system is in use. I just used a Logitech USB camera, but you may find that you need a wireless solution like the Ai Ball.
- Download and install Flash Media Live Encoder on the machine that will store the video logs. You will need to know the location of FMLEcmd once it’s installed. If you have a modern operating system, you can just search for it.
- Run the FMLE GUI interface. Here you can select, where videos will save (or

Don’t forget to change the CPU usage if you’re doing anything else with the machine that you’re using for recording.
stream, if your participants are cool with that) and general features of the video and audio. Now, click on the wrench icon next to the format (see left). I found it really important to set the CPU usage to “Very Low” (it’s “Dedicated” by default), otherwise the recording was actually messing with the other things the system was doing. You may find that there are other settings here that you need to tweak.
- Now, in your program, you just need to do a system call to FMLE when you’re ready to start recording. Find and kill the FMLE process when you’re ready to stop. These are common instructions in any language, so you should be able to find out how to do it from your program. Here are quick code bits for doing it in C#:

int hWnd = this.fmleProcess.Handle.ToInt32();
ShowWindow(hWnd, SW_SHOWMINIMIZED);
this.fmleProcess.Close();
Okay, that’s it! All of the recordings should be saved according to the settings that you set up in the FMLE GUI. With my participants, I asked them to mark any sessions that they wanted deleted, I could identify those recordings by their creation date and time, and delete those without watching.
Hope this helps somebody out there. I’d love to hear about clever way that you record or log system use during field deployment (beyond text system logs).


